
Introduction
This is our first major step towards our learnings. We are now quite sound with the ABC’s of chef. Now we announce the most compelling facet of chef. Cookbooks are the most crucial segment of the chef’s kingdom. Nothing worth having comes easy, so kickoff with more efforts.
“A Real Test Of a Good Chef Is, Perfectly Roasted Chicken.”
Julia Child
Wait wait wait !! fire your all cylinders but remember to breath.

Prerequisites
This article assumes that you are aware with the basics of Git and Vagrant. You know the basic functioning of chef and its recipes and resources. This article is written with centos7 platform. To know about chef follow our previous blogs of this series Chef Start here with ease.. .
Get started
Clone our git repo and fire up a vagrant box with this.
$ git clone https://github.com/OpsTree/Chef.git
-
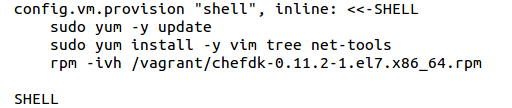
Go to Chef/centos/chefCookbooks directory. This directory contains a Vagrantfile, which can launch a centos7 vagrant machine with Chefdk and other essential tools installed.
$ cat Vagrantfile
-
Download Chefdk using below available command
$ cd Chef/centos/chefCookbooks
$ wget https://opscode-omnibus-packages.s3.amazonaws.com/el/7/x86_64/chefdk-0.11.2-1.el7.x86_64.rpm
-
This directory also includes a knife.rb file which sets the cookbook folder path and default editor for the virtual machine.
-
Launch a new vagrant machine and login into it.
$ vagrant up
$ vagrant ssh
Your working environment is ready. Let’s start with chef cookbooks.
Create your first cookbook
First create a dedicated directory for our cookbooks. As in knife.rb file it will be created by following command.
$ mkdir /vagrant/cookbooks
Chef manage its cookbooks using a version control system so next we initialize and also make our first commit for /vagrant/cookbooks directory. Provide your name and email for git configuration.
$ mkdir /vagrant/cookbooks
$ cd /vagrant/cookbooks
$ git init
$ git add .
$ git config –global user.email “[email protected]“
$ git config –global user.name “Your Name”
$ git commit -m “Initial Commit”
Now you are ready to start with the creation of your first cookbook.
Call up with knife
We are using knife to generate are cookbooks. Generate your cookbook for installing nginx and to set a virtual hosts opstree.com/blog/ and chef.opstree.com with this.
Generate our first cookbook using below written command. This command setup copyright, email, license, and readme format options for your cookbook.
$ knife cookbook create nginxVhost -C “Saurabh Vajpayee” -m “[email protected]” -I nginxv1 -r md

Let’s create a recipe
Create the default recipe with below provided command and put below available content.
$ vim /vagrant/cookbooks/nginxVhost/recipes/default.rb
package ‘epel-release’ do
action :install
end
package ‘nginx’ do
action :install
end
directory “#{node[‘nginx’][‘webroot’]}” do
recursive true
end
template “/etc/nginx/conf.d/#{node[‘nginx’][‘conffile’]}” do
source ‘chefmanagedconf.conf.erb’
variables(
:port => “#{node[‘nginx’][‘port’]}”,
:servername => “#{node[‘nginx’][‘servername’]}”,
:webroot => “#{node[‘nginx’][‘webroot’]}”
)
end
template “#{node[‘nginx’][‘webroot’]}/index.html” do
source ‘index.html.erb’
variables(
:servername => “#{node[‘nginx’][‘servername’]}”
)
end
line = “127.0.0.1 #{node[‘nginx’][‘servername’]}”
file = Chef::Util::FileEdit.new(‘/etc/hosts’)
file.insert_line_if_no_match(/#{line}/, line)
file.write_file
service ‘iptables’ do
action :stop
end
service ‘nginx’ do
action :restart
end
This file includes multiple chef resources and some variable like ‘webroot’, conffile, port and servername. These variables have their default values under attribute directory and used in the templates which are next to create.
Create attribute file
This file contains the default value of your variables used in recipes. Create a default.rb file and place these values.
$ chef generate attribute /vagrant/cookbooks/nginxVhost/ default
$ vim /vagrant/cookbooks/nginxVhost/attributes/default.rb
default[‘nginx’][‘port’] = “80”
default[‘nginx’][‘webroot’] = “/usr/share/nginx/blog”
default[‘nginx’][‘servername’] = “opstree.com/blog/”
default[‘nginx’][‘conffile’] = “opstree.com/blog/.conf”
Create templates
Create template file to provide dynamic touch to your files. First create template for “configuration” files, and put below provided content.$ chef generate template /vagrant/cookbooks/nginxVhost/ chefmanagedconf.conf
$ vim /vagrant/cookbooks/nginxVhost/templates/default/chefmanagedconf.conf.erb
server
{
listen <%= @port %>;
server_name ;
location / {
root ;
index index.html index.htm;
}
error_page 404 /404.html;
location = /404.html {
root ;
}
# redirect server error pages to the static page /50x.html
error_page 500 502 503 504 /50x.html;
location = /50x.html {
root ;
}
}
And next place template for index.html file with following content.
$ chef generate template /vagrant/cookbooks/nginxVhost/ index.html
$ vim /vagrant/cookbooks/nginxVhost/templates/default/index.html.erb
<!DOCTYPE html PUBLIC “-//W3C//DTD XHTML 1.1//EN” “http://www.w3.org/TR/xhtml11/DTD/xhtml11.dtd”>
<html xmlns=”http://www.w3.org/1999/xhtml” xml:lang=”en”>
<head>
<title>Test Page for the Opstree Server </title>
</head>
<body>
<h1>Welcome to <strong> <%= @servername %> </strong></h1>
</body>
</html>
Your cookbook is ready for initial workings. Let’s run it.
Run and feel like a million bucks
Run your cookbook with below command, and relax for a while.
$ sudo chef-client –local-mode –runlist ‘recipe[nginxVhost]’
By default this cookbook setup opstree.com/blog/ vhost if you want to setup another vhost chef.opstree.com then overiride default values of variables. To do this create a json file which declares the new values for variables.
$ vim /vagrant/runlist.json
{
“nginxVhost”: {
“webroot” : “/usr/share/nginx/chef”,
“servername” : “chef.opstree.com”,
“conffile”: “chef.opstree.com.conf”
},
“run_list”: [
“recipe[nginxVhost]”
]
}
And run chef-client once again with following commands.
$ sudo chef-client –local-mode -j /vagrant/runlist.json
Now you have power to create as many vhost automatically with chef.
Verify the vhost
$ curl opstree.com/blog/
$ curl chef.opstree.com
From now we have to work hard to match the expectation of the industry. You are now developing into a chef proficient. Do some experiments and play hard.

nice easy to understand.